



How to Select a Waterproof Backpack for Washington Camping
You’ve planned the perfect Olympic Peninsula trek, but the forecast just shifted to 80% chance of rain. Your gear is packed, yet your cotton T-shirts and down sleeping bag are sitting unprotected in a pack that looks like Swiss cheese under a downpour. This is the harsh reality of Washington camping—where mist, drizzle, and sudden cloudbursts are not exceptions but the norm. The solution isn’t just any dry bag; it’s choosing the right waterproof backpack for Washington camping that balances rain protection, breathability, weight, and real-world durability. In this guide, you’ll learn exactly how to evaluate fabrics, seams, closures, and fit so your next hike isn’t ruined by a soaked sleeping bag.
What Makes a Backpack Truly Waterproof for Pacific Northwest Conditions?
A truly waterproof backpack uses either a welded/tapered construction or a fully submersible dry-bag design. In Washington’s coastal and alpine environments, you need more than just a “water-resistant” outer shell—you need a barrier that prevents water ingress at seams, zippers, and roll-tops.
Defining Waterproof vs. Water-Resistant in Real Terms
Water-resistant fabrics (like standard ripstop nylon with a DWR coating) can handle light mist, but they fail under prolonged rain or when submerged. True waterproofing means the material (often TPU-coated nylon or PVC) and the seams are sealed or welded, preventing any moisture molecules from passing through. For Washington, always look for a hydrostatic head rating of at least 10,000mm—that’s the standard for heavy downpours.
The Critical Role of Seams and Tape
Even the best fabric is useless if the needle holes let water in. High-quality waterproof packs use sealed seams—either by taping on the inside or using ultrasonic welding. When you inspect a pack, flip it inside out; you should see tape covering every stitch line. If you see exposed stitching, that’s a leak point waiting to happen in the Hoh Rainforest.
Why Fabric Denier Matters for Wet Bushwhacking
Denier measures fabric thickness. For Washington’s rugged trails, a 200D to 500D TPU-coated nylon strikes the perfect balance. It’s thick enough to resist punctures from branches and rocks, yet flexible enough for comfortable packing. Avoid cheap 70D “packable” materials for camping—they tear too easily when wet.
How Does the Washington Climate Influence Your Backpack Choice?
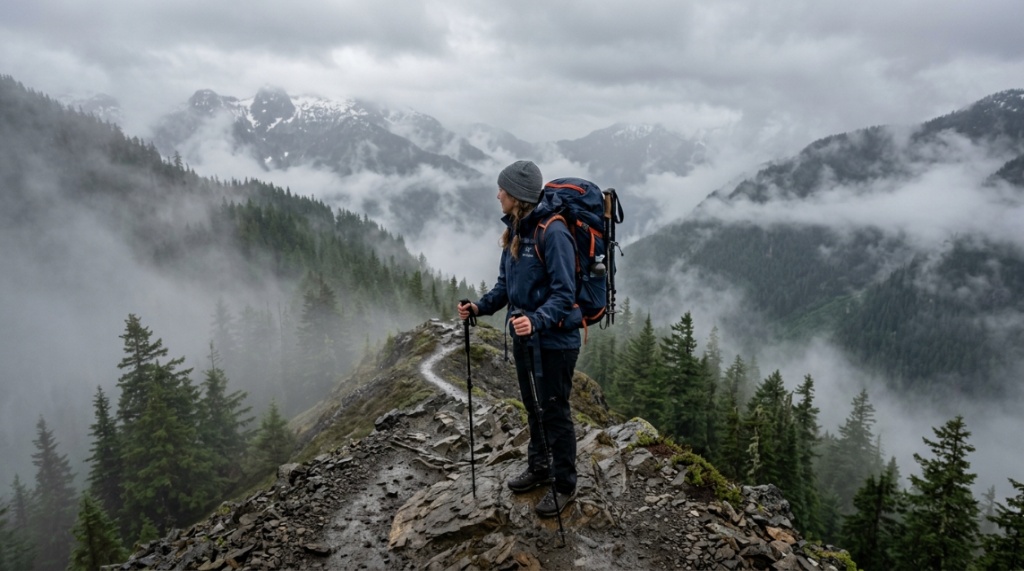
Washington’s climate ranges from temperate rainforests with over 140 inches of rain annually to alpine zones with snowmelt runoff. Your pack must handle constant humidity, sudden temperature shifts, and potentially cold, wet conditions that make gear heavier and harder to manage.
Key Weather Patterns on the West Side vs. East Side
West of the Cascades (Olympic Peninsula, Seattle, Mount Rainier), you face relentless drizzle and saturated trails. East of the Cascades (Leavenworth, Palouse), you might get dry heat but sudden thunderstorms. A pack that works for both must have a roll-top or dry-bag closure that seals completely, not just a flap that sheds light rain.
Understanding Humidity and Condensation Inside Your Pack
A waterproof pack can turn into a sauna if you’re hiking uphill in the rain. Because the material is non-breathable, sweat vapor condenses inside. This is why many mountaineers prefer a hybrid system: a waterproof main compartment with breathable outer pockets for wet layers or rain gear. You’ll need to plan for storage of wet tents and tarps separately.
Temperature Swings and Gear Volume Fluctuations
In spring, you might start at 40°F and end at 65°F. That means shedding layers into your pack. Look for a pack with external compression straps—not only do they stabilize the load, but they also help compress your internal dry bags without compromising the pack’s own waterproof integrity.
Which Closure System Is Most Reliable: Roll-Top, Zipper, or Flap?
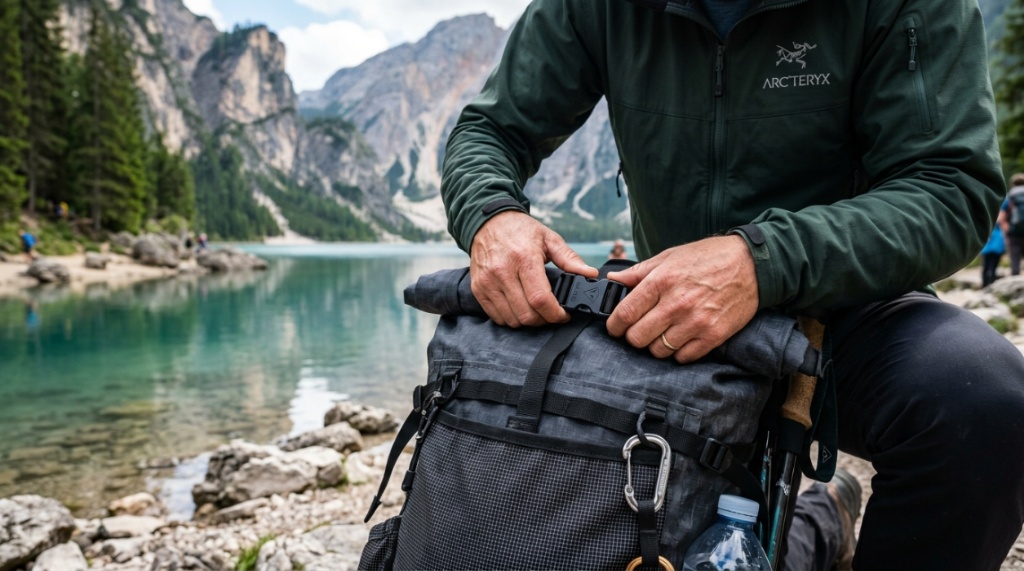
The roll-top closure is the gold standard for absolute waterproofing. However, many hikers prefer easy-access zippers. For Washington camping, the roll-top design wins because it eliminates the zipper—the most common failure point on outdoor gear.
The Pros and Cons of a Roll-Top Dry Bag Backpack
Roll-tops offer 100% waterproof sealing if rolled at least three times and clipped. They are simple, durable, and cost-effective. The downside is accessibility—you must unroll to grab a snack. But for kayak trips or basecamp setups, this is a non-issue. For day hikes, you might want a pack with an additional lidded pocket.
Can Waterproof Zippers Ever Be Fully Trusted in Heavy Rain?
Waterproof zippers (like YKK Aquaseal) are excellent, but they require regular maintenance—dirt and sand can compromise their seal. They are also stiffer and harder to open with cold fingers. For extended wet trips, a roll-top is safer. If you do choose a zipper, ensure it’s backed by a storm flap and a waterproof gasket inside.
Top-Lid Flaps and the Myth of the “Waterproof” Buckle
Many standard hiking packs have a top flap that covers a drawstring closure. This is not waterproof—only resistant. Rain will eventually work through the fabric and drawstring hole. If you prefer this style, you must use an internal dry liner or pack cover. There is no way around this for heavy PNW rain.
What Features Should You Prioritize for Wet, Muddy Trails?
When you’re slogging through the Quinault Rainforest, you need features that help you stay organized without letting moisture in. Look for external attachment points for wet gear, a durable bottom, and hip belts that don’t absorb water like sponges.
External Lash Points and Daisy Chains for Wet Gear
You will want to strap your wet tent fly or rain jacket to the outside. Daisy chains and compression straps let you do that without opening your main seal. This keeps wet, dirty items away from your dry clothes and sleeping bag.
Hip Belt and Shoulder Strap Materials That Don’t Soak
Closed-cell foam and mesh straps dry quickly and don’t hold several pounds of water. Avoid thick, open-cell foam that acts like a sponge. Also, check that the hip belt padding is sealed or has a waterproof liner—a soggy hip belt chafes and causes hypothermia risk.
Reinforced Base for Standing in Puddles and Mud
You will set your pack down on wet logs, muddy rocks, and saturated soil. A reinforced base with a thick TPU coating (often 500D+) resists abrasion and prevents moisture from wicking up through the pack’s bottom. A dry base isn’t just about comfort—it extends the pack’s lifespan.
Why Does Pack Weight and Volume Matter More When It’s Wet?
Wet gear is heavy—a cotton shirt can weigh three times more when soaked. Plus, a waterproof pack itself is heavier than a standard pack. You need to balance capacity against your physical limits, especially if you’re carrying a week’s worth of food and a bear canister.
How to Calculate the Ideal Capacity (30L vs. 50L vs. 70L)
For a weekend trip in the Cascades, a 40L pack often suffices. For a 5-day trip in the Olympic backcountry, you’ll need 60L-70L. However, many waterproof packs are “roll-top” with a large main body—you can compress them down if only half full. Always buy slightly larger than your typical base volume to accommodate wet clothes and extra food.
The Weight Penalty of Heavy-Duty Waterproofing Materials
A true waterproof backpack (e.g., using 300D TPU nylon) typically weighs 3 to 5 pounds. A standard pack might weigh 2 pounds but requires a separate rain cover (0.5 lb). However, the rain cover can blow off or fail at seams. Weigh the reliability of a fully welded pack against the weight. For short trips, a 50L dry-bag backpack is ideal—it’s simple, light, and bombproof.
Balancing Internal Organization vs. Simple Bucket Design
Fully waterproof packs often lack organizational pockets—they are just a big tube. For Washington camping, consider a hybrid: a waterproof main compartment and a few external “quick stash” pockets for your phone, map, or headlamp. These external pockets will get wet, but they offer convenience without compromising your core gear.
Can a Pack Cover Replace a True Waterproof Backpack?
No—a pack cover only protects the outside of your pack, not the inside on wet ground or during a sudden cloudburst when you’re scrambling over a log and slip. Covers also fail in high winds and can abrade your pack. For serious wet-weather camping, a true waterproof pack is the only reliable solution.
When a Pack Cover Might Be Sufficient
If you’re only hiking on well-drained trails in the summer and don’t expect submerged crossings, a pack cover can work. But in Washington’s shoulder seasons, be prepared for muddy trails and leaking bridge gaps. A cover is a backup, not a primary defense.
How to Test Your Current Pack for Leaks Before a Trip
Place a paper towel at the bottom of the inside, then set the pack in a bathtub filled with two inches of water for 15 minutes. Squeeze the pack to simulate pressure. If the paper towel is wet, you need a new pack or a heavy-duty liner. This simple test saves you from disaster on the trail.
DIY Liners vs. Buying a Dedicated Waterproof Pack
A dry bag liner inside a standard pack is cheaper and often just as effective. You can buy a 35L dry bag that fits inside a normal frame pack. However, you still have the weight and bulk of the outer pack. For most Washington campers, a dedicated waterproof backpack is more comfortable because it has no unnecessary frame weight and conforms to your back better when wet.
How to Choose the Right Fit and Sizing for Layered Rain Gear
A waterproof pack must fit snugly over multiple layers—a baselayer, fleece, and a thick hardshell. A poorly fitted pack shifts your weight and causes strain on your hips and shoulders. Always measure your torso length, not your height, when selecting a pack.
Measuring Your Torso and Hip Belt
To measure your torso, feel for the C7 vertebra (the bump at the base of your neck) and measure to your iliac crest (top of your hip bones). Most waterproof packs come in adjustable sizes—usually S/M and M/L. The hip belt should wrap fully around your iliac crest, not sit on your waistline—this is key for load transfer and comfort in wet conditions.
Optimal Suspension Systems for Heavy, Wet Loads
Look for a pack with a rigid yet flexible framesheet that keeps the pack off your sweaty back. A mesh back panel helps a little with breathability, but in a waterproof pack, the internal frame is usually welded to the shell. Test that the load lifter straps angle correctly to pull the weight onto your hips, reducing shoulder strain during long uphill climbs.
Adjusting Compression Straps for a Streamlined Wet Profile
If you’re carrying a smaller load, compress the pack’s side straps to keep the contents tight and the pack stable. A loose, floppy pack throws off your balance, especially when you’re navigating slippery roots and wet rocks. Compression also reduces the chances of internal gear shifting against the waterproof liner.
Which Materials and Construction Methods Offer the Best Long-Term Durability?
In the wet PNW, your pack will degrade faster than in arid climates. UV rays from rare sun, constant moisture, and abrasion from volcanic rock all take a toll. The best material is a laminated nylon with a polyurethane (TPU) coating, often 3-layer construction. But your choice also depends on how often you go out.
TPU vs. PVC-Coated Nylon—What’s the Difference?
TPU (thermoplastic polyurethane) is lighter, more flexible, and more environmentally friendly than PVC. PVC is heavier and can crack in cold temperatures. For camping in Washington’s freezing alpine zones, TPU is the superior choice due to its low-temperature flexibility. Always avoid packs with vinyl coatings—they stiffen and crack.
Understanding RF Welding vs. Stitched and Taped Seams
RF welding uses high-frequency waves to fuse the fabric layers, creating a bond that is stronger than stitching. Stitched and taped seams are common on budget packs, but the tape can peel off after years of use. When testing a pack, rub the inside tape—if it flakes, the pack is likely near the end of its life.
Repairability: Field Patching Kits for Torn Waterproof Packs
Even the best pack can get a puncture from a crampon or a sharp branch. Always carry a patch kit—most companies include one. For emergency repairs, use Tenacious Tape or a piece of ripstop nylon with Aquaseal adhesive. Practice patching at home before you need it in the backcountry.
How Much Should You Spend on a Quality Washington Waterproof Backpack?
You should expect to spend between $200 and $600 for a high-quality waterproof backpack from a reputable brand like Sea to Summit, Yeti, or Ortlieb. Cheaper options under $100 often use pre-consumer recycled fabric but cut corners on welds and hardware, leading to leaks within a season.
Budget Range (Under $150): What to Expect
In this range, you’ll find packable dry-bag backpacks (around 20-30L) with simple roll-tops. These are great for day hikes or as a camp summit pack, but they lack harness support for heavy loads. If you’re only carrying a lunch and a rain jacket, a budget pack works fine.
Mid-Range Investment ($150-$350): The Sweet Spot
This price range usually gets you a 40-60L pack with an aluminum stay and a proper hip belt. Brands like Mountainsmith and Granite Gear offer durable TPU-coated bags that hold up to frequent weekend trips. These are the best value for recreational campers.
Premium Packs (Over $350): Expedition-Grade Reliability
At this price, you get advanced features like injection-molded back panels, lifetime warranties, and materials that are guaranteed for years of hard use. These are ideal for professional guides, thru-hikers, or anyone who expects their gear to last a decade. If you’re a weekend warrior, the mid-range is often all you need.
If you’re still uncertain about which specific model fits your needs, check out this comprehensive review of the waterproof backpack for Washington camping that details top-rated options and user experiences to help you decide.
Step-by-Step Guide to Packing a Waterproof Backpack for Maximum Dryness
Even with the best waterproof pack, improper packing can lead to condensation and moisture buildup. The key is to use waterproof stuff sacks for critical items, but also ensure you don’t trap excess air that expands and forces water into the roll-top seal.
Step 1: Place Your Sleeping Bag at the Bottom
Use a compression sack for your sleeping bag to reduce volume and increase moisture resistance. Put it at the bottom of your pack—this is the area most likely to get submerged when you set the pack down. Ensure the compression sack is not overstuffed to the point of stressing the seams.
Step 2: Pack Heavy, Dense Items Vertically Against Your Back
Place your cook kit, bear canister, or water filter vertically against the framesheet. This keeps the center of gravity close to your back and prevents heavy items from shifting. If the items are wet, dry them with a bandana first to avoid interior condensation.
Step 3: Roll-Top Closure and Compression
After filling the pack, press down to expel trapped air before rolling the top. Roll it at least three full turns, then clip the side buckles. Do not overstuff the pack to the point where the roll cannot close easily—this creates a gap where water can enter.
Step 4: Store Wet Rain Jackets in External Pockets
Keep a lightweight packable jacket in an outer mesh or stretch pocket. This prevents contaminating your dry gear and allows quick access when you stop for a break. Always wring out the jacket before storing to reduce dripping.
Is a Separate Dry Sack Inside a Standard Pack a Better Option?
For some hikers, using a standard pack with an internal dry liner is more versatile—it allows you to use the easier top-zipper access and retain the pack’s organization. However, it adds weight and can still fail if the dry liner gets punctured. For Washington, a dedicated waterproof pack is more reliable, but a hybrid approach can be a smart compromise.
The Best of Both Worlds: Using a Waterproof Pack with a Detachable Daypack
Many premium packs have a detachable daypack or summit pack. This is highly useful in Washington: you can leave your heavy main pack at a basecamp and take a light dry-bag backpack to a summit like Mount Ellinor. Look for models with a clip-on attachment system that doesn’t compromise the pack’s waterproof integrity.
Pros and Cons of Internal Dry Liners
Pros: Cheap (under $30) and can turn any pack waterproof. Cons: Adds 7-10 ounces; it’s awkward to access gear at the bottom; and if the liner shifts, it can leave gaps. For simplicity, I recommend a purpose-built waterproof pack over a liner for most uses.
How to Set Up a Hybrid System for a Multi-Day Trek
Use a standard pack with a roll-top dry liner for your sleeping bag and clothes. Keep your food and cook kit in a separate waterproof barrel. This system is used by many river rafters. Just be aware that the pack’s front pockets will get wet, so keep critical electronics in a small case inside the dry liner.
Common Mistakes Campers Make with Waterproof Backpacks
Understanding these pitfalls will help you extend your pack’s life and avoid hypothermia. Most failures are due to user error, not manufacturing defects.
Overstuffing Beyond the Rolled Closure
When you overstuff, the top will not roll properly, and the seal is compromised. Always leave at least 3 inches of headroom. If you can’t roll the top three times, you need a bigger pack.
Ignoring the Importance of UV Exposure on the Trail
UV rays can degrade TPU coating overtime, even in cloudy Washington. When you are not using your pack, store it inside a stuff sack or in the shade. Prolonged exposure to sunlight at high altitudes can cause the material to become brittle and crack.
Neglecting Zipper and Buckle Maintenance
Sand and dirt from trails can jam buckles and zippers, breaking the waterproof seal. Clean your zippers with a soft brush and apply zipper wax (like Bibia Lube or a silicone spray) after every trip. This is a 10-minute job that saves you hundreds in replacement costs.
Frequently Asked Questions
What is the best waterproof backpack for Washington camping?
The best waterproof backpack for Washington camping is a roll-top dry-bag backpack with welded seams, a capacity of 40-60L, and a supportive hip belt. Popular models include the Sea to Summit Hydraulic Drysack, the Ortlieb Atrack, and the Yeti Panga for extreme conditions.
Can I use a regular backpack with a rain cover for hiking Mount Rainier?
Yes, but only on dry days or short day hikes. On the summit trails, rain covers are unreliable due to high winds. A better option is an internal dry liner combined with a pack cover, but a true waterproof pack is the safest bet.
Does a waterproof backpack breathe?
No, fully waterproof packs are non-breathable. However, many brands substitute a breathable back panel with mesh padding to reduce sweating on your back. This is a compromise—the core fabric is solid, but the padding allows some airflow.
How do I clean my waterproof backpack after a muddy hike?
Rinse with cold water and mild soap, then wipe down with a soft sponge. Avoid machine washing and harsh chemicals. Reinitiate the coating occasionally using a TPU-friendly spray or a mixture of seam sealant for the interior tape to ensure longevity.
Are waterproof backpacks heavier than regular ones?
Yes, because the TPU coating and welded construction add 1-2 pounds compared to uncoated nylon packs. However, you often save weight by not needing a separate rain cover or dry bag liner.
Can I swim with a waterproof backpack?
Most roll-top dry bags can float if sealed correctly, but they are not designed as personal flotation devices. For kayaking or canoeing, ensure the bag has a float or is fixed to your boat. Do not rely on it to keep you afloat.
Which capacity waterproof backpack do I need for a weekend trip?
For a 2-night trip in Washington’s summer, a 35-40L pack is sufficient. For winter or shoulder seasons with extra bulky coats and sleeping pads, choose a 50L. Always pack your sleeping bag and tent first to check the volume.
Conclusion
Selecting the right waterproof backpack for Washington camping comes down to understanding materials, closures, and fit. Prioritize a roll-top seal and welded seams over cheap zippers, and don’t underestimate the weight of a wet load. Your pack is the lifeline of your shelter and safety—invest wisely. Whether you’re traversing the Hoh River Trail or ascending Mount St. Helens, a reliable pack will keep your sleeping bag dry and your spirit high. Take your time to test the fit and check the seams before hitting the trail. The rain is coming, but you’ll be ready. Choose a pack with confidence, pack it correctly, and the Pacific Northwest’s wild beauty will reward you—rain or shine.
